How to create a private GitHub repository example
Ever since they became a standard offering on a free tier, private GitHub repositories have become popular with developers. However, many developers become discouraged when they trigger a fatal: repository not found error message in their attempts to clone a private GitHub repository.
In this tutorial, we will demonstrate how to create a private GitHub repository, then demonstrate how to securely clone and pull your code locally without the need to deal with fatal errors.
How to create a private GitHub repository

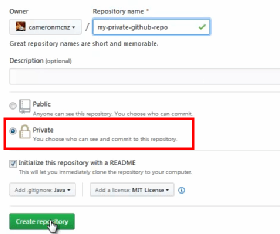
There aren't any special steps required to create a private GitHub repository. They're exactly the same as if you were to create a standard GitHub repository, albeit with one difference: You click the radio button for the Private option.
How to clone a private GitHub repository

The first thing a developer wants to do after the creation of a GitHub repository is to clone it. For a typical repo, you would grab the repository's URL and issue a git clone command. Unfortunately, it's not always that simple on GitHub's free tier.
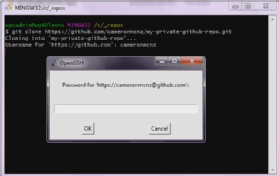
If you're lucky, when you attempt to clone your private GitHub repository, you'll be prompted for a username, after which an OpenSSH window will then query for your password. If you provide the correct credentials, the private repository will clone.
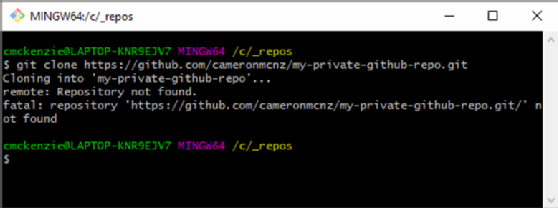
However, if OpenSSH isn't configured on your system, an attempt to clone the private repository will result in the fatal: repository not found GitHub error message.

Fix repository not found errors
If you do encounter this dreaded error message, don't fret, because there's a simple fix. Prepend the private GitHub repository's username and password to the URL. For example, if my username was cam and the password was 1234, the git clone command would look as follows:
git clone https://cam:[email protected]/cameronmcnz/private-github-repo.git
Since you embedded the credentials in the GitHub URL, the clone command takes care of the authorization process, and the command will successfully create a private GitHub repository clone on your local machine. From that point on, all future git pull and git fetch commands will run successfully.
And that's it. Hopefully this how to create a private GitHub repository example will get you started with your cloud based Git tooling, and help you avoid any of the pitfalls many people face when trying to create and clone a repo that isn't public.


