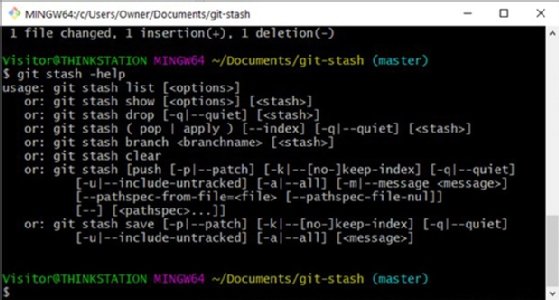
Simple git stash example
Every software developer should be familiar with the git stash command -- yet most introductory Git tutorials and even advanced GitHub or GitLab courses rarely mention it.
The lack of awareness about the git stash command is a shame because the ability to temporarily shelve changes without issuing a commit is a powerful feature.
This quick git stash example shows just how easy it is to use the git stash's push, pop and apply commands.
How to use the git stash command
Let's envision a simple example of a common scenario a developer might run into that would require the use of the git stash command.
- A developer fetches or pulls the latest code down from GitHub and begins to make changes to some source files.
- The development team lead instructs the developer to stop what they're doing to fix some bugs.
- The developer doesn't want to commit their code because it's experimental and doing so would break the build.
- At the same time, the developer doesn't want to do a hard reset because all the changes would be lost.
- To solve the problem, the developer temporarily shelves their changes with a git stash.
- The developer then fixes the bug and performs a normal commit.
- The developer unshelves the files previously put in the stash with a call to the stash's pop or apply commands.
If a programmer wants to temporarily set aside changes they can return to later, the git stash command makes that happen.
Git stash example with steps
Here are the actual steps a programmer performs to temporarily shelve changes with the git stash command:
- Start off with a fresh Git commit.
- Edit some source files.
- Issue a git stash command.
- Continue to commit code as needed.
- Call the git stash pop command at any point to reapply the shelved files.
Let's walk through each of those steps in a simple example of how to use the git stash command.
Step 1: Create a Git commit history
To stash changes, you first need a Git repository and a commit history. We'll use the git init command to create a new repo, add two files and create a commit.
git init

echo "A solid start." >> solid.html

echo "This may get flakey." >> flakey.html

git add .

git commit -m "Situation normal"
Step 2: Update a file after a commit
Now update one of your tracked files, but don't perform a commit.
echo "Good but experimental content." >> flakey.html
Step 3: Stash the changes
Now imagine you had to abandon your changes because you had to switch branches, or work on a bug fix, revert a previous commit or even cherry-pick from another branch.
To avoid performing a commit, you can stash your changes instead:
git stash push
Now the changes to the flakey.html file are stored in the stash, not in a commit.
Step 4. Perform commits normally
After the developer issues the git stash command, it's safe to edit code and perform commits as usual. Here's how to fix and commit the solid.html file.
echo "This is a solid fix" >> solid.html

git add .

git commit -m "Solid file is fixed."

Step 5: Pop or apply the git stash
Now that the fix is in, you can unshelve the experimental changes made earlier to the flakey.html file. This is done by invoking the stash's pop or apply commands.
git stash apply
This will bring back the content that was previously stashed.
Which command is used to stash changes in Git?
While this command is often overlooked by many introductory Git and GitHub tutorials, every developer should know about the git stash to easily and temporarily store changes they don't want to commit.
Hopefully, after going through this git stash command example, you'll be more likely to use this feature yourself.
Cameron McKenzie has been a Java EE software engineer for 20 years. His current specialties include Agile development, DevOps and container-based technologies such as Docker, Swarm and Kubernetes.


