Spring 3 Tutorial: Setting Up & Configuring The Environment
Spring without XML files? - What an idea! This tutorial will show you everything you need to know in order to start developing and testing stand-alone Spring 3.0 applications.
There really isn’t anything too difficult about learning Spring. Spring, at its core, is a very simple and easy to learn “Inversion of Control” (IoC) container, and I’m going to show you just how easy it is to learn. But before you can learn how to leverage the benefits of a Spring IoC container, you have to have an environment setup that will allow you to write, test, compile and run some Spring-based code.
Updated inversion of control (IoC) tutorials and dependency injection examples
TheServerSide has been updating its resources in terms of the Spring framework, Java EE contexts and various different approaches to inversion of control (IoC) and dependency injection (DI). Check out these newer resources on the topic:
- What does Inversion of Control mean? IoC explained clearly
- A modern Inversion of Control example in Java using Spring
- Drawbacks to IoC problems and how to solve inversion of control problems
- Spring MVC Java web development with Spring Boot
- Spring IoC vs. Google Guice's inversion of control approach
- Getting started with Google Guice
- Getting started with the Spring IoC container
At the bare minimum, you need a Java Development toolKit, or JDK, at version 1.5 or higher, installed on your machine. Know where your JDK is installed. If you haven't got one installed already, well, all I can say is "shame on you."
Make Sure You've Installed a JDK
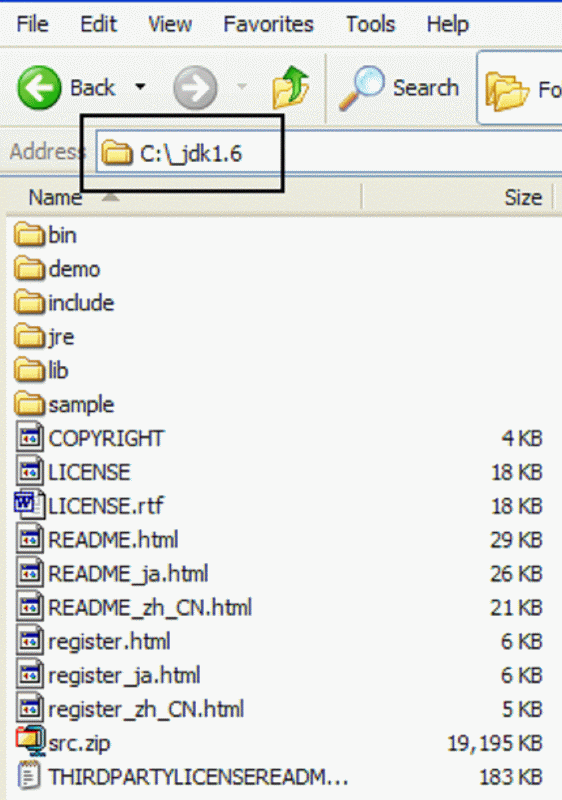
I’ve got my JDK installed to the _jdk1.6 folder off the root of C:\.
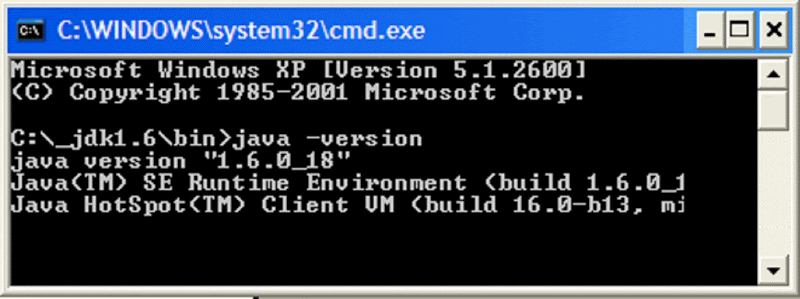
This tutorial is going to be hard-core, so if you want to follow it, you’re going to have to open a command window, move to the bin directory of your JDK, and be ready to issue some old-school java and javac commands. The first command you can issue is to verify the version of the JDK you are using: java –version. My JDK installation spits back a version of 1.6.0_18, which is more than sufficient for meeting the minimum requirements of the Spring 3.0 framework.
Download Spring: RELEASE.zip & -dependencies.zip
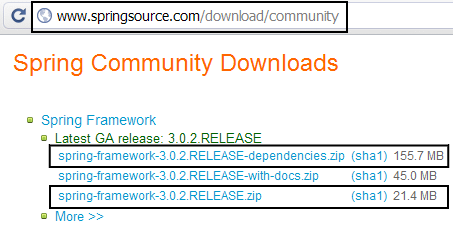
The next thing you need to do is download the Spring framework. You’ll have to find the download at the springsource.com website. The URL that was used at the time of writing was http://www.springsource.com/download/community At that location you’ll likely have a few options for downloading. The two you need right now are the 21.4 meg download named spring-framework-3.0.2.RELEASE.zip, and the 155.7 meg download named spring-framework-3.0.2.RELEASE-dependencies.zip.
Unzip the 21.4 meg RELEASE downloaded to the root of C:\. You will end up with a folder named spring-framework-3.0.2.RELEASE.
Grab the Required JAR Files
Create a folder on your C:\ drive named _springlib
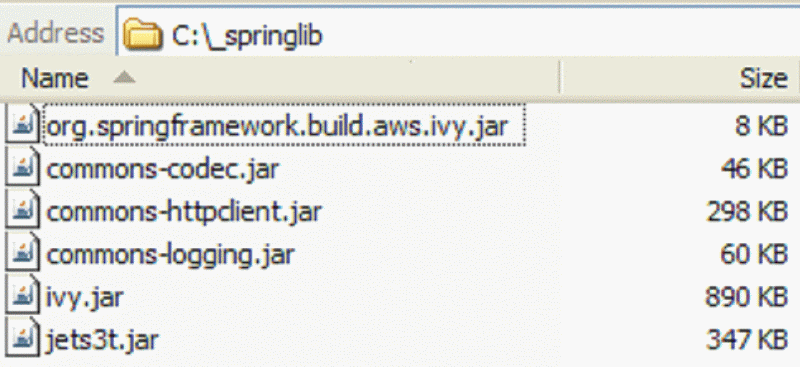
Move to the folder named C:\spring-framework-3.0.2.RELEASE\projects\spring-build\lib\ivy. This folder contains five JAR files. Move each of these JAR files into the C:\_springlib folder that you just created.
Next you need to move to the following folder: C:\spring-framework-3.0.2.RELEASE\dist
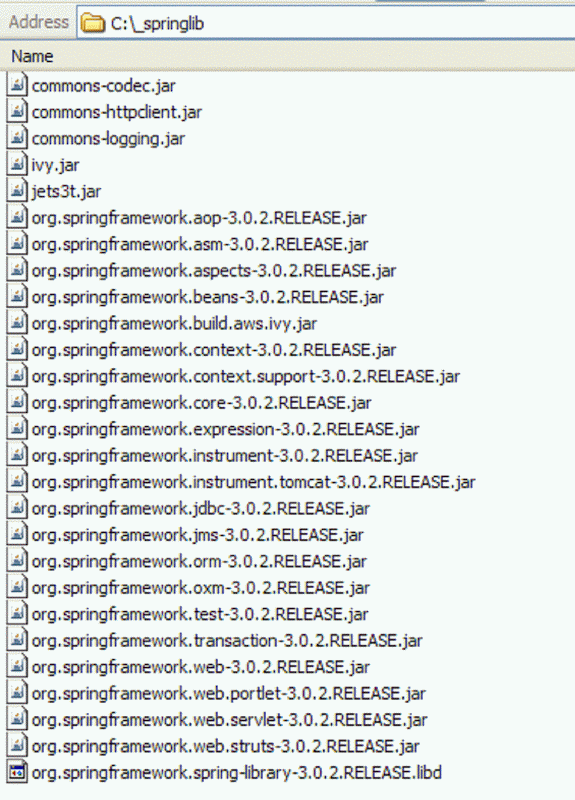
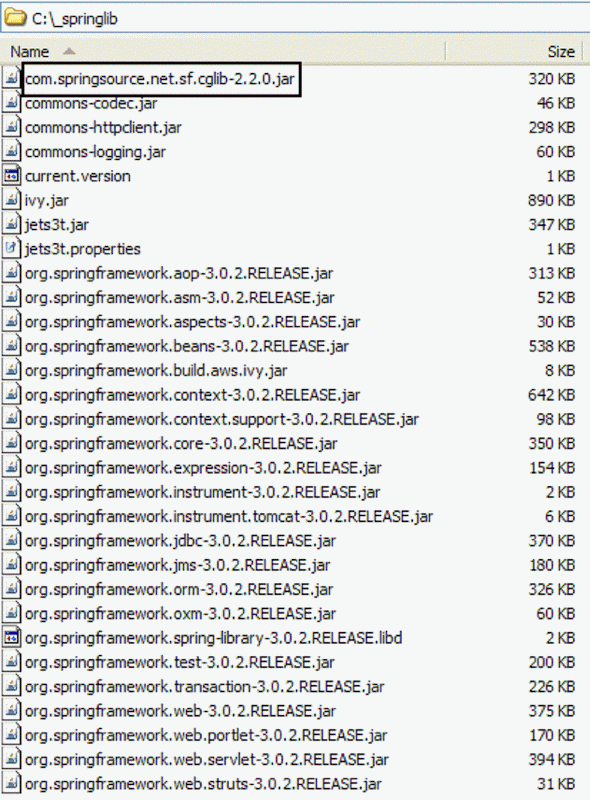
Take all of the files in the C:\spring-framework-3.0.2.RELEASE\dist folder, and move them into the _springlib folder as well. Here’s what the _springlib folder should look like after everything has been moved:
com.springsource.net.sf.cglib-2.2.0.jar is the last JAR we need to hunt down.
Locate com.springsource.net.sf.cglib-2.2.0.jar
Unzip the 127 meg DEPENDENCIES download to a folder named SPRING_DEPENDENCIES. Under that directory, you will find a folder structure that looks something like this:
C:\SPRING_DEPENDENCIES\net.sourceforge.cglib\com.springsource.net.sf.cglib\2.2.0
In the 2.2.0 folder, find the file named com.springsource.net.sf.cglib-2.2.0.jar, and move that as well into the _springlib folder.
Write Some Code
I’m going to create a folder named _mycode right off the root of C:\, and throw three subfolders into it, creating a directory structure of C:\_mycode\com\mcnz\spring
In last leaf of this folder, I’m going to create a simple Java file named BillRunner. We're going to model a simple billing system for a Cloud computing operation, and the BillRunner will be the entry point of the application. So go right ahead and create a Java class, named BillRunner, that has a runnable main method.
package com.mcnz.spring;
public class BillRunner {
public static void main(String[] args) {
}
}
The next step is to just make sure everything is configured properly. To do this, I’m going to import and create an instance of a pivotal Spring class, and just do a System.out.print( ) on the instance. If we can compile and run the code, then we’ve successfully configured our environment to develop, test and run Spring based Java applications.
package com.mcnz.spring;
import org.springframework.context.annotation.AnnotationConfigApplicationContext;
public class BillRunner {
public static void main(String[] args) {
AnnotationConfigApplicationContext context
= new AnnotationConfigApplicationContext();
System.out.println(context);
}
}
Compile and Run: Are You Configured???
To compile the BillRunner class, while referencing the _springlib folder on the Java classpath, issue the following command from the C:\_mycode folder:
C:\_mycode> c:\_jdk1.6\bin\javac -classpath "C:\_springlib\*" C:\_mycode\com\mcnz\spring\*.java
Issue the following command from the _mycode folder to run the compiled code:
C:\_mycode> c:\_jdk1.6\bin\java -classpath "C:\_springlib\*";C:\_mycode com.mcnz.spring.BillRunner
Here’s the output from running the BillRunner. There’s nothing sexy here, but if you can get some console output, something like the output below, then you’re ready to start doing some real Spring development, because your environment has been successfully configured, and you're linking to all of the required Spring JAR files at both runtime and compile time:
org.springframework.context.annotation.AnnotationConfigApplicationContext@d1e604
: startup date [Wed Dec 31 19:00:00 EST 1969]; root of context hierarchy
Here’s what my command prompt looks like after successfully running and compiling the BillRunner.

Spring 3 Without XML? The Next Tutorial
Congratulations. You're up and running, and capable of running stand-alone, Spring based applications. Your next step should be writing some slightly more complicated Java code, and see how you can leverage Spring's Inversion of Control container. The next tutorial demonstrates how to both do Spring without XML, and how to do it old school with the standard XML configuration file.
You should follow Cameron McKenzie on Twitter: @cameronmcnz
Interested in more articles and opinion pieces from Cameron McKenzie? Check these out:
- Continuous integration quickstart: A step-by-step Jenkins tutorial for beginners
- A step-by-step Jenkins tutorial
- Create a Jenkins freestyle project
- Shell scripts and the Jenkins environment variables list
- What's better? Jenkins or Maven?
- Can you answer these 10 Jenkins quiz questions?
- Jenkins Git integration with GitHub
- Jenkins Git environment variables
- Microservices deployment? How to embed Tomcat in an executable JAR
Recommended Books for Learning Spring
Spring in Action ~ Craig Walls
Spring Recipes: A Problem-Solution Approach ~ Gary Mak
Professional Java Development with the Spring Framework ~ Rod Johnson PhD
Pro Java EE Spring Patterns: Best Practices and Design Strategies ~ Dhrubojyoti Kayal


