How to install SQLite on Windows
How to install SQLite3
SQLite is an incredibly lightweight and remarkably popular SQL-compliant database.
In fact, it’s so lightweight that many microdevices and Linux distributions come with SQLite preinstalled, which is why it’s always smart to check if it’s already installed before installing SQLite a second time.
How do I check if SQLite is installed?
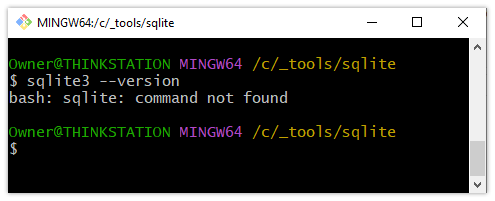
To verify if SQLite is already installed and configured on your local OS, simply issue the sqlite3 --version command in a terminal window. If the command fails, you will need to isntall SQLite.
Where can I download SQLite?
The SQLite install media can be downloaded for free from sqlite.org. You won’t hit a registration wall or be asked to sign up for a newsletter. The barriers to entry are minimal for SQLite.
To install SQLite on Windows, you are advised to download and extract two ZIP files:
- The 64-bit DLL for SQLite
- The SQLite command line tool bundle
SQLite3 files
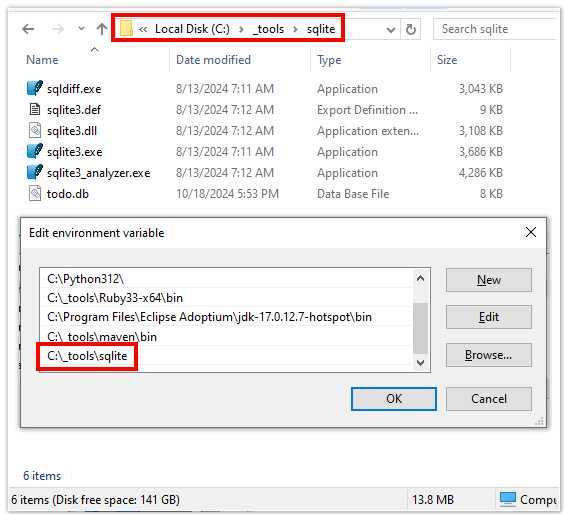
SQLite version 3.47.0 ZIP file extraction will save the following five files to your hard drive:
- sqldiff.exe
- sqlite3.def
- sqlite3.dll
- sqlite3.exe
- sqlite3_analyzer.exe
Add SQLite3 to the System PATH
Move the SQLite files into an appropriate folder on your operating system and then add that folder to your operating system’s PATH variable in order to make the database globally accessible.
Environment variables are only read when the terminal window first loads, so close any open command prompts and then open a new one and type in the sqlite3 --version command.
The command should now be recognized by the terminal, and the version of the installed SQLite3 database will be displayed.
Databases, tables and CRUD in SQLite3
With the SQLite3 database installed, you now have a light-weight, fully-functional, SQL-compliant database ready for use.
You are now fully prepared to explore the SQLite3 Command Line Interface, which is exactly where this next SQLite tutorial will take you.


