How to publish GitHub Actions artifacts by example
Artificats in GitHub Actions tutorial
When a GitHub Actions workflow successfully completes a build, it creates artifacts such as zip files, compiled code, Java JAR files and other assembled components.
Unfortunately, the ephemeral Docker container on which the GitHub Actions artifacts are created disappears once the workflow completes. But it’s not that hard for a developer to have GitHub archive those artifacts and make them available as a downloadable link.
How? Just use the GitHub upload-artifact action.
Steps to publish GitHub Action artifacts
A developer should follow these five steps to publish GitHub Actions artifacts for download:
- Perform GitHub Actions build steps
- Create a temporary folder in the container being used
- Copy all artifacts of interest into that temporary folder
- Use GitHub’s upload-artifact action
- Provide a meaningful name for the artifact download link
- Specify the path to the folder containing your GitHub Action artifacts
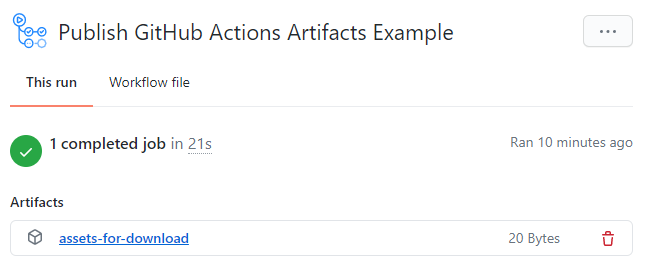
- Run the GitHub Actions workflow and find the published artifacts on the workflow’s build page
GitHub Actions artifacts YAML example
The easiest way to demonstrate how GitHub’s artifact upload action works is to add a step to a simple workflow that creates a temporary directory. Then, use the touch and echo commands to create a few simple files. Once a developer completes this action, the files will publish as artifacts.
| Your intro to GitHub Actions training course |
|---|
| Here’s how to get started with GitHub Actions:
Follow these tutorials to learn GitHub Actions fast. |
Developers should use the following GitHub Actions workflow example to publish artifacts so they become available for download on the GitHub Actions build summary page:
# Publish GitHub workflow artifacts tutorial example
name: Publish GitHub Actions Artifacts Example

on:
  push:
    branches: [ main ]

jobs:

  archive-build-artifacts:
    runs-on: ubuntu-latest
    steps:

      - name: Step 1 - Create a temporary artifact downloads folder
        run: mkdir downloads

      - name: step 2 - Add artifacts to publish to the temp folder
        run: |
          cd downloads
          echo 'alpha'    > alpha.html
          echo 'bravo'    > bravo.html
          echo 'charlie'  > charlie.html
          cd ..

      - name: Step 3 - Use the Upload Artifact GitHub Action
        uses: actions/upload-artifact@v2
        with:
          name: assets-for-download
          path: downloads
GitHub Actions artifacts explained
The keys to this entire example are the following three steps:
- First, create a folder named downloads;
- Second, add some files to the downloads folder; and
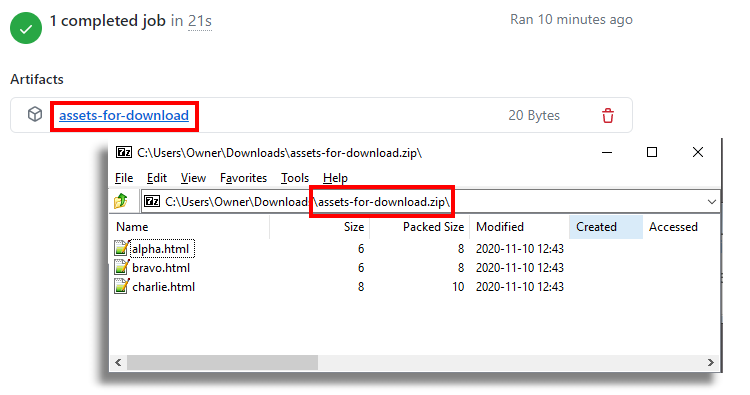
- Third, use the GitHub upload-artifact action to pull all the files in the downloads folder and package them in a zip file named assets-for-download.zip.
The newly created zip file is the one that then becomes downloadable on the artifacts page when the GitHub Actions workflow runs.
Published artifacts in GitHub
If a developer isn’t familiar with the echo and output switch, the following command will create a file on the local filesystem named alpha.html with the text ‘alpha’ contained within it:
echo 'alpha' > alpha.html
Workflow artifact downloads
When this build runs, the status page of the workflow will include a link to download a file named assets-for-download.zip, which will contain the three files named alpha.html, bravo.html and charlie.html. This proves that the script works and makes the GitHub Action artifacts available for download.


