How to install Tomcat as your Java application server
If you’re interested in Java based web development, you’ll more than likely need to install Tomcat. This Tomcat installation tutorial will take you through the prerequisites, show you where to download Tomcat, help you configure the requisite Tomcat environment variables and finally kick off the Tomcat server and run a couple of example Servlets and JSPs to prove a successful installation.
Tomcat prerequisites
There are minimal prerequisites to install Tomcat. All you need is a version 1.8 installation of the JDK or newer with the JAVA_HOME environment set up, and optionally the JDK’s bin folder added to the Windows PATH. Here is a Java install tutorial if that prerequisite is yet to be met.
If you are unsure as to whether the JDK is installed — or what version it is — simply open up a command prompt and type java -version. If the JDK is installed, this command will display version and build details.
C:\example\tomcat-install\bin>java -version
java version "1.8.0"
Java(TM) SE Runtime Environment (build pwa6480sr3fp20-20161019_02(SR3 FP20))
IBM J9 VM (build 2.8, JRE 1.8.0 Windows 10 amd64-64 Compressed References 20161013_322271 (JIT enabled, AOT enabled)
J9VM - R28_Java8_SR3_20161013_1635_B322271
JIT - tr.r14.java.green_20161011_125790
GC - R28_Java8_SR3_20161013_1635_B322271_CMPRSS
J9CL - 20161013_322271)
JCL - 20161018_01 based on Oracle jdk8u111-b14
Download Tomcat
You can obtain Tomcat from the project’s download page at Apache.org. Find the zip file that matches your computer’s architecture. This example of how to install Tomcat is on a 64-bit Windows Xeon machine, so I have chosen the 64-bit option.
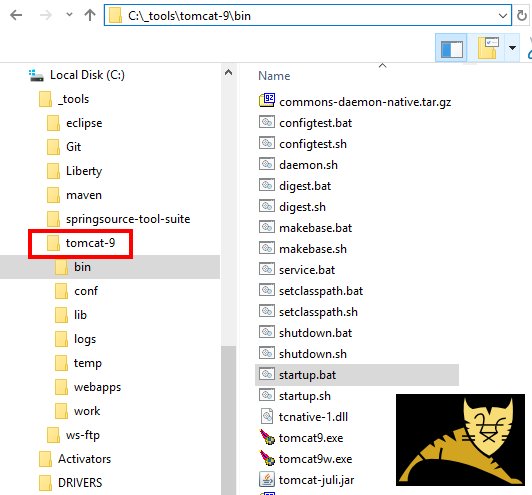
Unzip the file and rename the folder tomcat-9. Then copy the tomcat-9 folder out of the \downloads directory and into a more suitable place on your files system. In this Tomcat tutorial, I’ve moved the tomcat-9 folder into the C:\_tools directory.
Tomcat environment variables
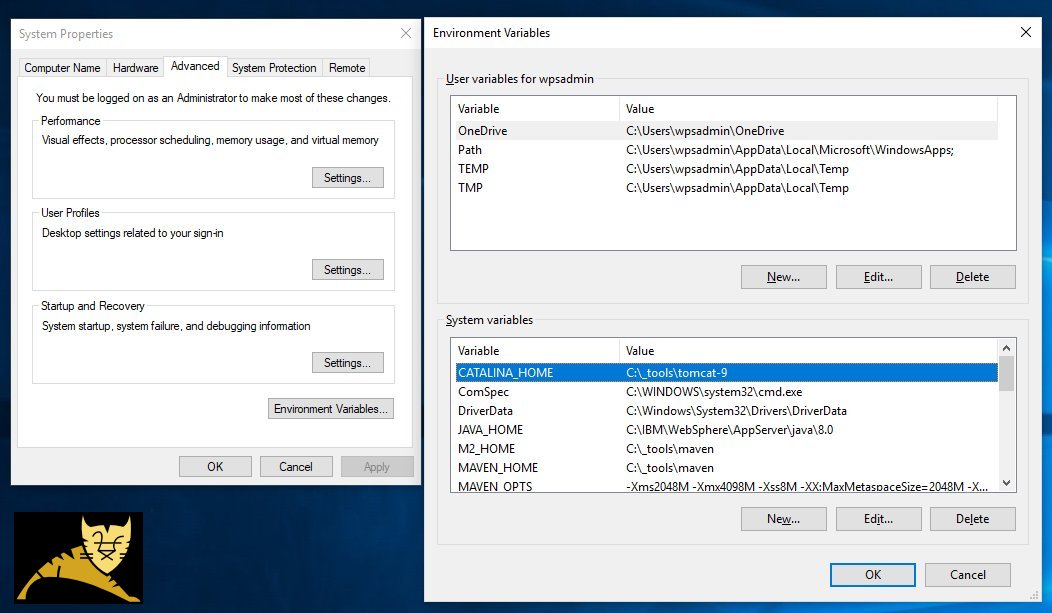
Applications that use Tomcat seek out the application server’s location by inspecting the CATALINA_HOME environment variable value. So, create a new environment variable named CATALINA_HOME and have it point to C:\_tools\tomcat
To make Tomcat utilities such as startup.bat and shutdown.bat universally available to command prompts and Bash shells, you can put Tomcat’s \bin directory on the Windows PATH, but this isn’t required.
How to start the Tomcat server
At this point, it is time to start Tomcat. Simply open a Command Prompt in Tomcat’s \bin directory and run the startup.bat command. This will start Tomcat and make it accessible through http://localhost:8080
example@tutorial MINGW64 /c/example/tomcat-9/bin
$ ./startup.bat
Using CATALINA_BASE: “C:\_tools\tomcat-9”
Using CATALINA_HOME: “C:\_tools\tomcat-9”
Using CATALINA_TMPDIR: “C:\_tools\tomcat-9\temp”
Using JRE_HOME: “C:\IBM\WebSphere\AppServer\java\8.0”
Using CLASSPATH: “C:\_tools\tomcat-9\bin\bootstrap.jar;C:\_tools\tomcat-9\bin\tomcat-juli.jar“
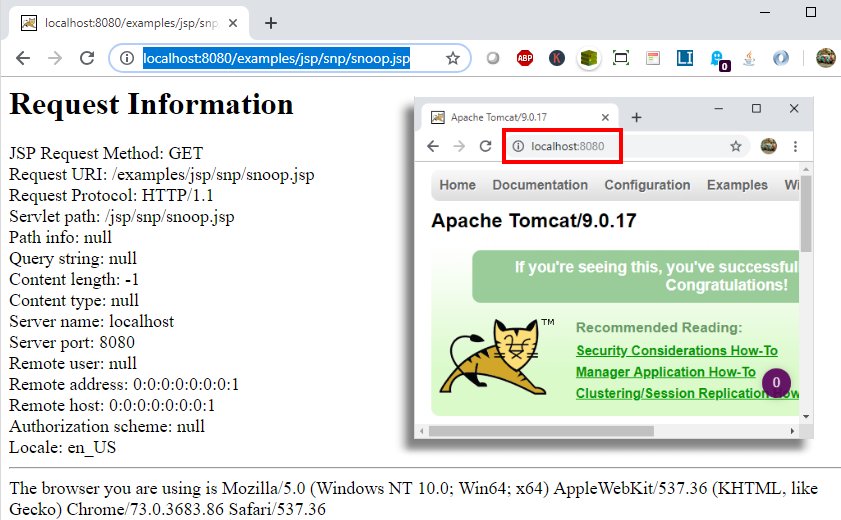
After you verify that the Apache Tomcat landing page appears at localhost:8080, navigate to http://localhost:8080/examples/jsp/ and look for the option to execute the Snoop servlet. This Tomcat example Servlet will print out various details about the browser and your HTTP request. Some values may come back as null, but that is okay. So long as the page appears, you have validated the veracity of the Tomcat install.
And that’s it. That’s all you need to do to install Tomcat on a Windows machine.


