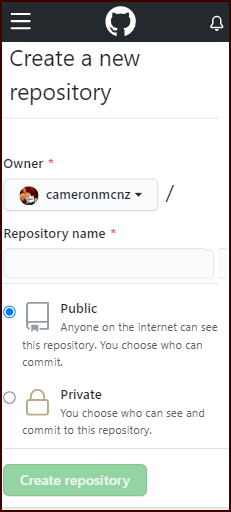
How to create a GitHub repository example
The key to GitHub-based DevOps is the Git repository around which every operation is based. After a developer registers and account, the first step they need to take is to create a GitHub repository.
Developers can get started with their GitHub journey by simply clicking the green “New” button on the repositories page.

Create a GitHub repository with online creation wizard.
How to create a GitHub repository
Developers can follow these 10 steps to create a GitHub repository:
- Log into the GitHub administrative console
- Move to the GitHub Repositories page
- Click on the green “New” button
- This will bring up the GitHub repo creation wizard
- Enter the name of the GitHub repository
- Include a description (optional)
- Choose to make this a public or private GitHub repository
- Add a README (optional)
- Include a .gitignore file for your development framework (optional)
- Choose a fair use license
- Click the green “Create Repository” button to finish the process
Post GitHub repository creation steps
Once the GitHub repository is created, developers will need to obtain the unique GitHub URL associated with it and provide it to other developers and DevOps professionals.
With this URL, developers can clone the GitHub repo along with any Git submodules it may include. Other lifecycle activities include renaming the GitHub repo or deleting a GitHub repo.
However, hopefully it takes a while after a developer creates a GitHub repository that they want to use any rename or delete operations.
Become a Git power user
Want to become a Git power user? Review the following articles and tutorials that dive more into Git.
- How to do a Git clean up of branches and commits
- Learn to rebase onto master and rebase from the master branch
- Squash all Git commits on a branch down to one
- Shelve your changes with Git stash pop and apply
- Easily explain the Git vs. GitHub difference
- Add a shallow git clone of depth 1 to your Jenkins jobs
- Set up a local Git server with a bare Git repo


